Background Fetch
New Multitasking APIs
iOS 7から追加されたマルチタスク用APIの「Background Fetch」について書きます。
概要
「Background Fetch」は、ユーザーがアプリを開く前に、コンテンツをアップデートできるようにします。そうすることで、新しいコンテンツが、ユーザーに見てもらうのを待つ状態をつくります。
実装方法
- Xcode > Target > Capabilities > Background ModesをONにして、Background fetchをチェックする
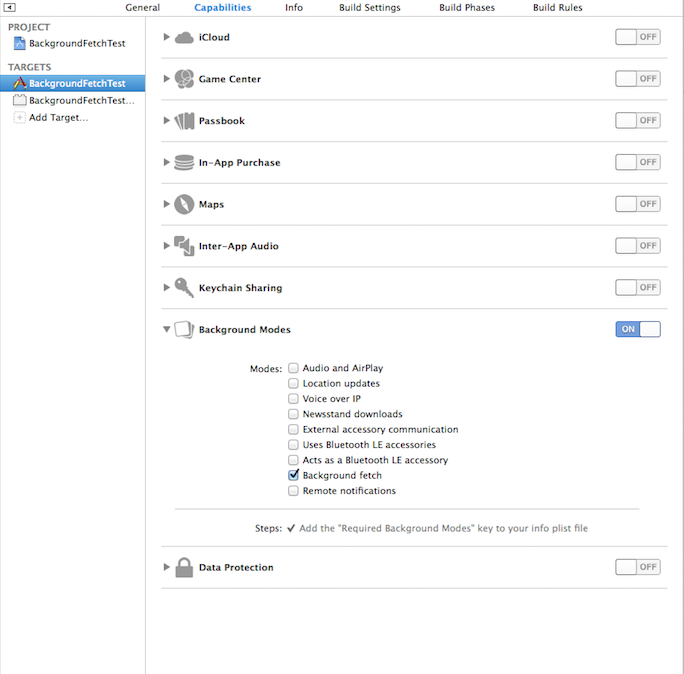
- Background fetchを有効にする(インターバルを設定)
- (BOOL)application:(UIApplication *)application didFinishLaunchingWithOptions:(NSDictionary *)launchOptions
{
    // Set background fetch interval
    [application setMinimumBackgroundFetchInterval:UIApplicationBackgroundFetchIntervalMinimum];
}
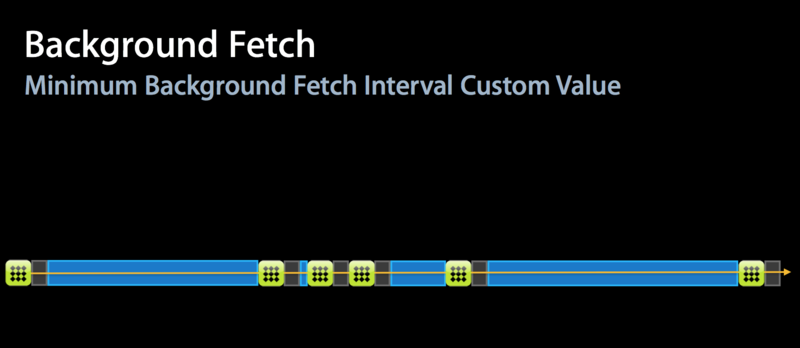
Background Fetch interval minimum
- アプリケーションから呼ばれるデリゲートメソッドを実装する
- (void)application:(UIApplication *)application performFetchWithCompletionHandler:(void (^)(UIBackgroundFetchResult))completionHandler
{
    // Retrieve content
    …

    // Must call completion handler
    completionHandler(UIBackgroundFetchResultNewData);
}
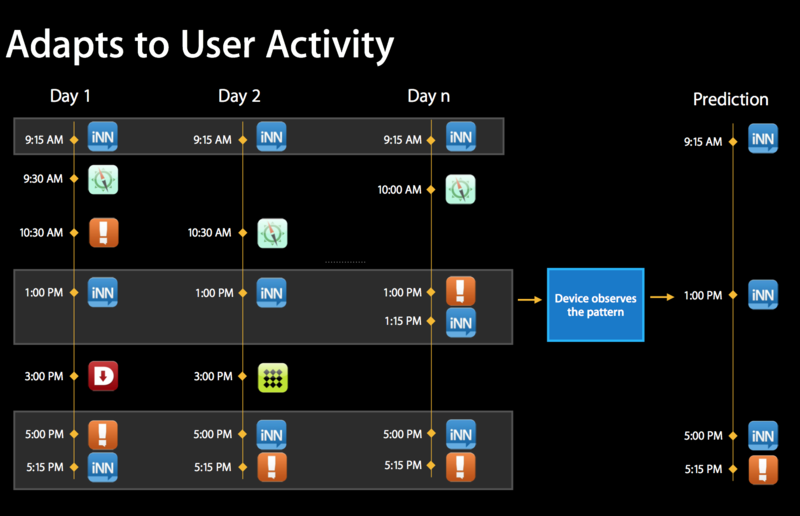
※上記のデリゲートメソッドが呼ばれるタイミングは、システムがユーザーの行動パターンを分析し、その結果を元に、アプリが起動される前のタイミングに呼ばれるようになっているようです。 Fetch timing
Background fetchの使いどころ
Appleのドキュメントでは以下のケースで、Background fetchを利用することを推奨していました。 - Social network feeds - News and entertainment - Blog aggregators - Weather - Finance
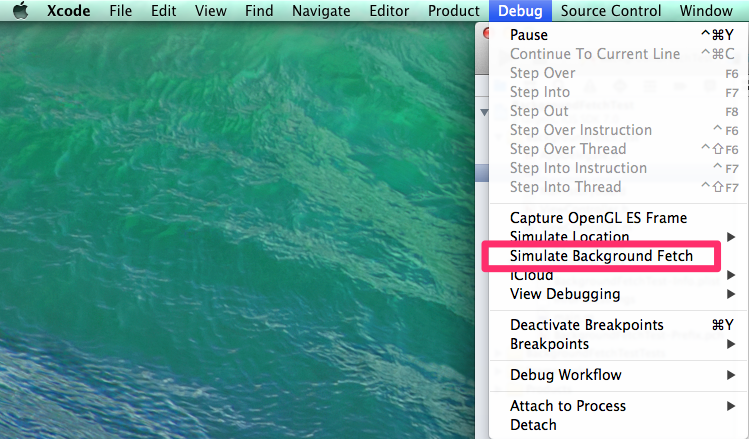
デバッグ方法
Xcode > Debug > Simulate Background Fetchを選択するとデリゲートメソッドが呼ばれます。
所感
こちらの技術ブログで現在の歩数をバックグラウンドでツイートするといったアイディアが書かれていました。他にも有用な利用方法があるかどうか、考えてみたいと思います。
参考情報
http://qiita.com/griffin_stewie/items/8371c09059b3ba7bb202
WWDC 2013 What’s New with Multitasking Session 204
Xcode5 Debugger tips


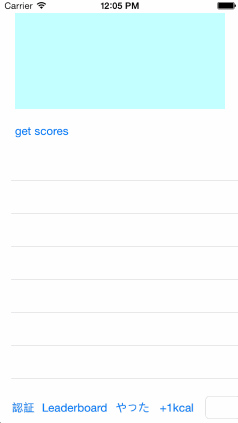
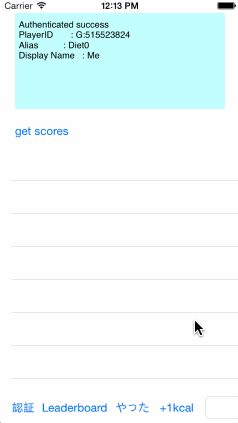
Apple Game Centerサービスのリーダーボードを使ってみた
Game Centerのリーダーボードについて説明します。
Game Center
Game CenterはiOS4.x以降から利用できる、Apple社が提供するゲームSNSサービスです。Game CenterにApple IDでサインインすることでiOSのGame Center対応アプリと連携し、アプリ側からスコアを保存することができ、ランキング表示、オンライン対戦等の実装が可能になります。
Game Centerの主な機能
- リーダーボード
- アチーブメント
- チャレンジ
- マッチメーク
- リアルタイム対戦
- ホスト型の対戦
- ターン制の対戦
リーダーボードについて
ゲームスコアのランキング用レコードで、1アプリにつき、最大500個作成できる。レコードを複数のアプリで共有することもできる。
保存できるデータ
スコアデータとして64bit整数のみ保存可能、また、スコアデータの他にスコアコンテキストというものがあり、同じく64bit整数が保存できる。
ログイン認証
Sample code
// Authenticate
- (void)authenticateLocalPlayer
{
    GKLocalPlayer  __weak *localPlayer;
    localPlayer = [GKLocalPlayer localPlayer];
    localPlayer.authenticateHandler = ^(UIViewController* viewController, NSError* error){
        if (nil != viewController) {
            // Show authentication dialog controller
            if ([self.delegate respondsToSelector:@selector(gameCenterManagerRequestedShowAuthenticationDialog:)]) {
                // Notify it
                [self.delegate gameCenterManagerRequestedShowAuthenticationDialog:viewController];
            }
        }
        else if (localPlayer.authenticated) {
            // Load friends
            [localPlayer loadFriendsWithCompletionHandler:^(NSArray* friendIDs, NSError* error) {
                // Notify
                if ([self.delegate respondsToSelector:@selector(gameCenterManagerAuthenticateSuccess:)]) {
                    // Notify it
                    [self.delegate gameCenterManagerAuthenticateSuccess:localPlayer];
                }
            }];
        }
        else {
            if ([self.delegate respondsToSelector:@selector(gameCenterManagerAuthenticateFaild)]) {
                // Notify it
                [self.delegate gameCenterManagerAuthenticateFaild];
            }
        }
    };
}
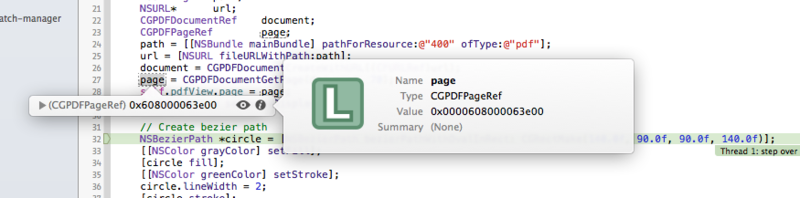
CKLocalPlayerを作成し、authenticateHandlerプロパティにBlockを設定する。Block引数の「viewController」が認証用コントローラーとなっている。
↓認証用コントローラーのキャプチャ
ランキングの表示方法
・GKGameCenterViewControllerを使うのが簡単。GameCenterを利用するための一通りのUIを提供してくれる。
Sample code
- (void)_showgameCenterController
{
    GKGameCenterViewController *gameCenterController = [[GKGameCenterViewController alloc] init];
    if (nil != gameCenterController)
    {
        gameCenterController.gameCenterDelegate = self;
        gameCenterController.viewState = GKGameCenterViewControllerStateLeaderboards;

        [self presentViewController: gameCenterController animated: YES completion:nil];
    }
}
↓GKGameCenterViewControllerのキャプチャ
ランキング表示を独自実装するために用いるGame Kitのクラス
ランキング表示を独自で実装する場合は、下記のクラスを使います。
| クラス名 | クラスの機能 |
|---|---|
| GKScore | ゲーム本体の中でGKScoreオブジェクトを生成し、こ れを使ってGame Center上のLeaderboardにスコアを送信します。逆に Leaderboardからスコア情報を取得する場合も、スコアはGKScoreオブ ジェクトの形で得られます。 |
| GKLeaderboard | Leaderboardからスコア データを検索する際にGKLeaderboardオブジェクトを生成しま す。 |
| GKLocalPlayer | GameCenterにサインインしているユーザーの詳細情報を管理します |
Sample Code
スコアの送信
// Create score
GKScore *scoreReporter = [[GKScore alloc] initWithLeaderboardIdentifier:identifier];

// Set score value
scoreReporter.value = score;

// Set context value
scoreReporter.context = 0;

// Report score
[scoreReporter reportScoreWithCompletionHandler:^(NSError *error) {}];
ランキングの取得
// Create leaderboard
GKLeaderboard *leaderboardRequest = [[GKLeaderboard alloc] init];

// Set player scope (GKLeaderboardPlayerScopeGlobal or GKLeaderboardPlayerScopeFriendsOnly)
leaderboardRequest.playerScope = GKLeaderboardPlayerScopeGlobal;

// Specifying the duration
leaderboardRequest.timeScope = GKLeaderboardTimeScopeToday;

// Decide record from which to get
leaderboardRequest.identifier = @"Combined.LandMaps"

// Specifies the top 10
leaderboardRequest.range = NSMakeRange(1,10);

// Request
[leaderboardRequest loadScoresWithCompletionHandler: ^(NSArray *scores, NSError *error) {
// スコア情報を処理する。
}];
所感
サーバを用意しなくても、アプリにランキング機能をつけられるので便利です。欲を言うと、単純な整数だけでなく、文字列も送れるようになってほしい。
参考情報
https://developer.apple.com/jp/devcenter/ios/library/documentation/GameKit_Guide.pdf
Strech Button
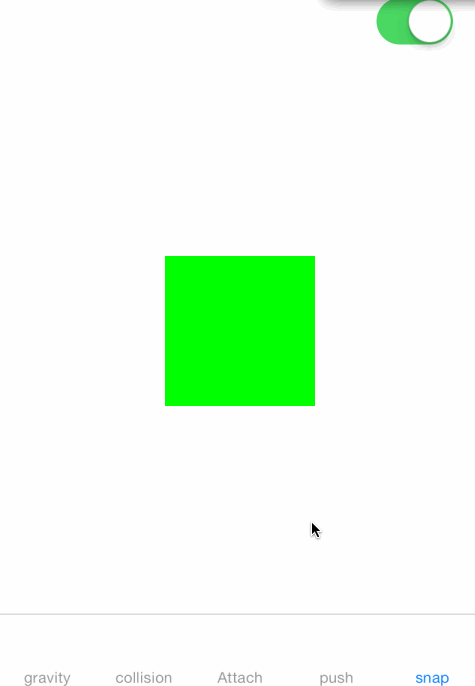
UIDynamicsフレームワークのUISnapBehaviorを使って伸び縮みするボタンのようなものを作りました。
(↓ぐにょ〜っとした物体)
UISnapBehaviorとは
UISnapBehaviorは、Viewに設定するだけで、バネのような動きをリアルに再現してくれます
(↓1つのViewにUISnapBehaviorを適用した例)
作り方(概要)
UISnapBehaviorを適用したViewを円状に配置します。
Viewをドラッグさせる必要があるため、それぞれのViewにUIPanGestureRecognizerを追加します。
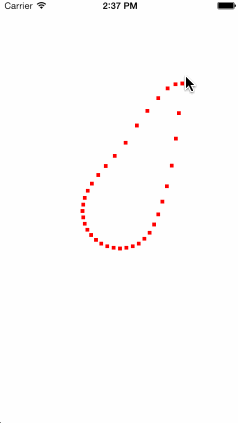
ドラッグ中、UIPanGestureRecognizerのセレクター内で、それぞれのViewの座標を設定します。座標の設定には加速度を利用します、加速度はドラッグされているViewに近いものほど大きく、遠いものほど小さくなるような計算式を使います。
(↓こんな感じに)
ドラッグ中のViewの座標の計算は必要ですが、UISnapBehaviorを利用することにより、ドラッグが終わった後、Viewがバネのような動きを伴って元の位置に戻るアニメーションを実装をしなくていいという点が、一番のメリットです。
このバネのような動きがリアルにできていてすごいです!
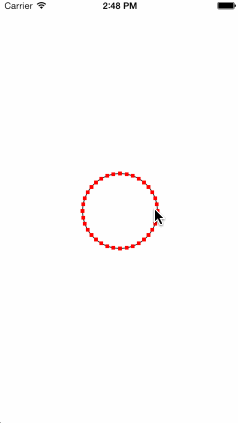
Viewの座標をもとにパスを描画します
(↓こんな感じに)
最後に、Viewを消して、パスを塗りつぶせば完成です!
所感
UIDynamicsを利用すれば色々と面白い動きをしたものが手軽に出来そうだと、あらためて思いました。また何か思いついたら作ってみます。
UICollectionViewのレイアウト変更について
iOS 7から新しく追加されたAPIを使い、UICollectionViewのレイアウト変更をUINavigationViewControllerと連携させる方法について説明します。
UICollectionViewのレイアウトを変更する際、UICollectionViewのuseLayoutToLayoutNavigationTransitionsプロパティを使うと、UINavigationControllerと連携することができます。 UINavigationControllerと連携することで、実装が安易になる、UIが分かりやすい、といったメリットがあります。
以下、useLayoutToLayoutNavigationTransitionsプロパティについて説明している、ドキュメントの冒頭です。
useLayoutToLayoutNavigationTransitions

This property helps facilitate transitions between two or more collection view controllers using a navigation controller.
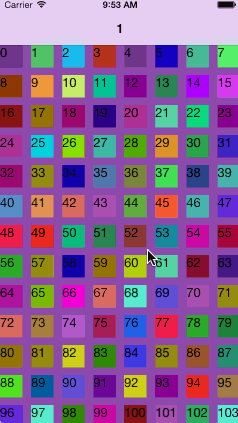
useLayoutToLayoutNavigationTransitionsプロパティを使った場合
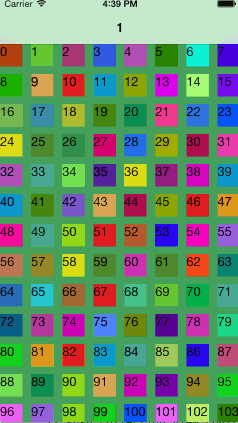
useLayoutToLayoutNavigationTransitionsプロパティを使わない場合
Code Example
// Cooperate with navigation controller to switch collection view layout
/////////////////////////////////////////////////////////////////////////////////
newCollectionViewcontroller.useLayoutToLayoutNavigationTransitions = YES;
/////////////////////////////////////////////////////////////////////////////////

// Push collection view controller
[self.navigationController pushViewController:newCollectionViewcontroller animated:YES];
useLayoutToLayoutNavigationTransitionsプロパティをYESに設定し、NavigationControllerにCollectionViewControllerをプッシュします。
プッシュするとレイアウトがアニメーションを伴って変更されます。
このとき、ナビゲーションバーに戻るボタンが表示され、表示された戻るボタンをタップすることで元のレイアウトに戻すことが出来ます。
注意点
※コントローラをプッシュしていますが、最初のCollectionViewが使い回されているようです。
検証ログ
-[CollectionViewController viewWillAppear:] : 47
------------------------------------------
self.navigationController.viewControllers.count : 1
self : <CollectionViewController: 0x10e81c1c0>
self.collectionView : <UICollectionView: 0x10c04a800; frame = (0 0; 320 568); clipsToBounds = YES; autoresize = W+H; gestureRecognizers = <NSArray: 0x10ae79ec0>; layer = <CALayer: 0x10ae77f90>; contentOffset: {0, -64}> collection view layout: <UICollectionViewFlowLayout: 0x10e81b830>
self.collectionView.dataSource : <CollectionViewController: 0x10e81c1c0>
self.collectionView.delegate : <CollectionViewController: 0x10e81c1c0>
-[CollectionViewController viewWillAppear:] : 47
------------------------------------------
self.navigationController.viewControllers.count : 2
self : <CollectionViewController: 0x108fd3e70>
self.collectionView : <UICollectionView: 0x10c04a800; frame = (0 0; 320 568); clipsToBounds = YES; autoresize = W+H; gestureRecognizers = <NSArray: 0x10ae79ec0>; layer = <CALayer: 0x10ae77f90>; contentOffset: {0, -64}> collection view layout: <UICollectionViewFlowLayout: 0x10e81b830>
self.collectionView.dataSource : <CollectionViewController: 0x10e81c1c0>
self.collectionView.delegate : <CollectionViewController: 0x10e81c1c0>
-[CollectionViewController viewWillAppear:] : 47
------------------------------------------
self.navigationController.viewControllers.count : 3
self : <CollectionViewController: 0x10ad18f00>
self.collectionView : <UICollectionView: 0x10c04a800; frame = (0 0; 320 568); clipsToBounds = YES; autoresize = W+H; gestureRecognizers = <NSArray: 0x10ae79ec0>; layer = <CALayer: 0x10ae77f90>; contentOffset: {0, -38}> collection view layout: <UICollectionViewFlowLayout: 0x108fd3ad0>
self.collectionView.dataSource : <CollectionViewController: 0x10e81c1c0>
self.collectionView.delegate : <CollectionViewController: 0x108fd3e70>
-[CollectionViewController viewWillAppear:] : 47
------------------------------------------
self.navigationController.viewControllers.count : 4
self : <CollectionViewController: 0x108fdc660>
self.collectionView : <UICollectionView: 0x10c04a800; frame = (0 0; 320 568); clipsToBounds = YES; autoresize = W+H; gestureRecognizers = <NSArray: 0x10ae79ec0>; layer = <CALayer: 0x10ae77f90>; contentOffset: {0, -3}> collection view layout: <UICollectionViewFlowLayout: 0x10ad18b60>
self.collectionView.dataSource : <CollectionViewController: 0x10e81c1c0>
self.collectionView.delegate : <CollectionViewController: 0x10ad18f00>
-[CollectionViewController viewWillAppear:] : 47
------------------------------------------
self.navigationController.viewControllers.count : 5
self : <CollectionViewController: 0x10ae06110>
self.collectionView : <UICollectionView: 0x10c04a800; frame = (0 0; 320 568); clipsToBounds = YES; autoresize = W+H; gestureRecognizers = <NSArray: 0x10ae79ec0>; layer = <CALayer: 0x10ae77f90>; contentOffset: {0, 102}> collection view layout: <UICollectionViewFlowLayout: 0x108f9db00>
self.collectionView.dataSource : <CollectionViewController: 0x10e81c1c0>
self.collectionView.delegate : <CollectionViewController: 0x108fdc660>
Not cooperating UINavigationController
ナビゲーションコントローラーと連動させずにレイアウトを変更するには、以下のメソッドを使用します。
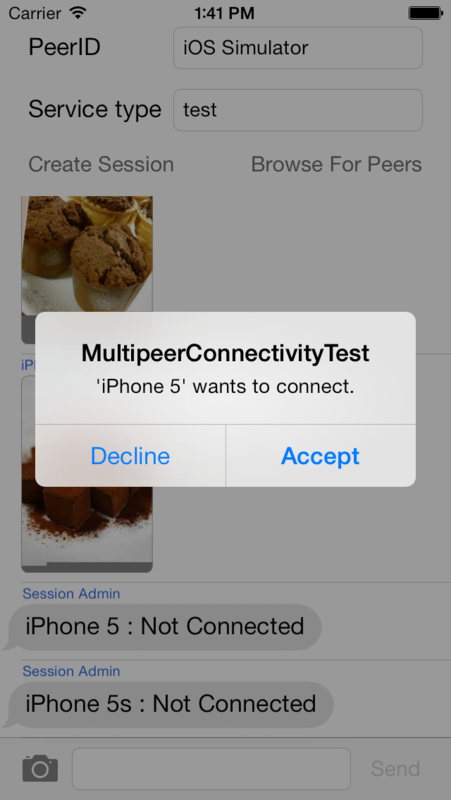
Multipeer Connectivityを試してみた
Multipeer Connectivity Framework
Multipeer Connectivityを試してみた
iOS 7に追加されたフレームーワークでWifiやBluetoothを利用した近距離にあるiOS端末間のPeer to Peer 通信を手軽に実現するためのフレームーワークです。
ユースケース
- 文書、写真の共同編集作業
- ファイル共有
- センサーデータの集積
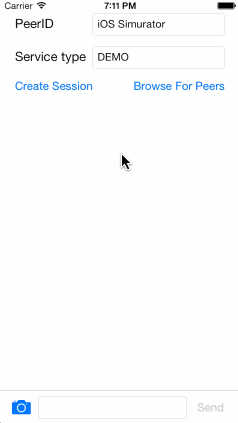
DEMO
Multipeer Connectivity Framework API クラス群
MCPeerID
MCSession
- 複数のピア間の通信を管理
MCAdvertiserAssistant
- ピアを他のピアから存在を発見できるようにする(アドバタイズ)
- 接続要求に対する処理
MCBrowserViewController
- ピアの検索
- ピアのリスト表示
- 接続要求の送信
- 接続の確立
接続方法
接続要求を受け取る準備
- peerIDを作成します
_peerID = [[MCPeerID alloc] initWithDisplayName:@"displayName"];
- セッションを作成します
_session = [[MCSession alloc] initWithPeer:_peerID securityIdentity:nil encryptionPreference:MCEncryptionRequired];
_session.delegate = self;
- ピアを他のピアから存在を発見できるようにします
_advertiserAssistant = [[MCAdvertiserAssistant alloc] initWithServiceType:@"serviceType" discoveryInfo:nil session:_session];
[_advertiserAssistant start];
接続要求を送信する
- MCBrowserViewControllerを作成/表示する
    MCBrowserViewController *browserViewController;
    browserViewController = [[MCBrowserViewController alloc] initWithServiceType:_serviceType session:_session];
    browserViewController.delegate = self;
    browserViewController.minimumNumberOfPeers = kMCSessionMinimumNumberOfPeers;
    browserViewController.maximumNumberOfPeers = kMCSessionMaximumNumberOfPeers;
[self presentViewController:browserViewController animated:YES completion:nil];
- MCBrowserViewControllerのUI
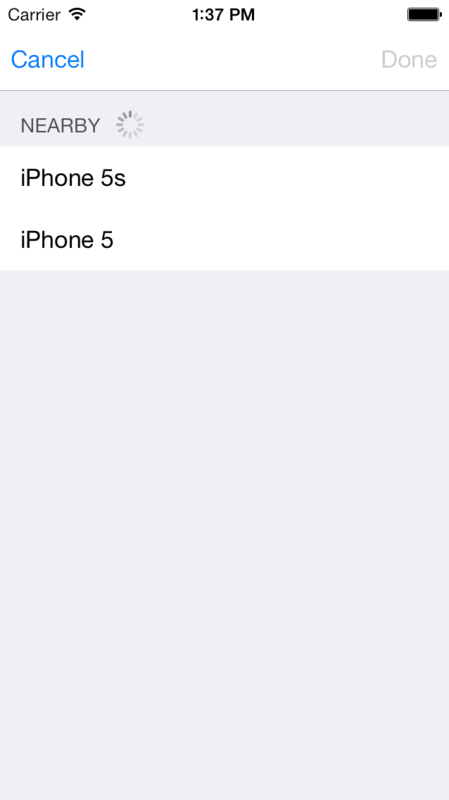
- MCBrowserViewControllerが表示されると自動的に近くの端末が検出されます、検出された端末をタップすると、接続要求が送信されます。
- 接続要求受信時のキャプチャ
接続状態
ピアの接続状態が変化するとMCSessionのデリゲートメッソドが呼ばれる
-(void)session:(MCSession *)session peer:(MCPeerID *)peerID didChangeState:(MCSessionState)state
データの送受信
テキストの送信
// Send a data message to a list of destination peers
- (BOOL)sendData:(NSData *)data toPeers:(NSArray *)peerIDs withMode:(MCSessionSendDataMode)mode error:(NSError **)error;
テキストの受信
// テキストを受け取ったとき呼ばれる
- (void)session:(MCSession *)session didReceiveData:(NSData *)data fromPeer:(MCPeerID *)peerID
リソースの送信
Send a resource (a file or an HTTP document) referenced by an NSURL;
 completionHandler is called when the resource is received by the remote
 peer or if an error occurred.
- (NSProgress *)sendResourceAtURL:(NSURL *)resourceURL withName:(NSString *)resourceName toPeer:(MCPeerID *)peerID withCompletionHandler:(void(^)(NSError *error))completionHandler;
リソースの受信
- (void)session:(MCSession *)session didStartReceivingResourceWithName:(NSString *)resourceName fromPeer:(MCPeerID *)peerID withProgress:(NSProgress *)progress

-(void)session:(MCSession *)session didFinishReceivingResourceWithName:(NSString *)resourceName fromPeer:(MCPeerID *)peerID atURL:(NSURL *)localURL withError:(NSError *)error
バイトストリームの送信
Opens a byte stream to a nearby peer.
- (NSOutputStream *)startStreamWithName:(NSString *)streamName toPeer:(MCPeerID *)peerID error:(NSError **)error
バイトストリームの受信
Called when a nearby peer opens a byte stream connection to the local peer.
-(void)session:(MCSession *)session didReceiveStream:(NSInputStream *)stream withName:(NSString *)streamName fromPeer:(MCPeerID *)peerID
サンプル
More Information
https://developer.apple.com/library/prerelease/ios https://developer.apple.com/library/prerelease/ios/samplecode/MultipeerGroupChat/Introduction/Intro.html#//apple_ref/doc/uid/DTS40013691
参考情報
http://tech.voyagegroup.com/archives/7333988.html http://dev.classmethod.jp/references/ios-multipeer-apiusage/
iOS 7のMessage appのようなUIを作ってみた
UICollectionView + UIKitDynamics
実装方法
UICollectionViewFlowLayoutとUIKitDynamicsを連携させます。
- UICollectionviewFlowLayoutのサブクラスを作成し、CollectionViewに設定する。
- 作成したサブクラスは、UIDyanicsAnimatorのインスタンスを持ち、LayoutAttributesに対して、DynamicBehaviorを作成し、UIDynamicsAnimatorが管理する。
- CollectionViewには、UIDynamicAnimatorの管理するDynamicBehaviorのLayoutAttributesオブジェクトを返すようにする。
手順
UICollectionviewFlowLayoutのサブクラスを作成する
@interface DynamicsFlowLayout : UICollectionViewFlowLayout
    @property (nonatomic) UIDynamicAnimator* animator;
    @property (nonatomic) NSMutableSet* visibleIndexPathsSet;
    @property (nonatomic) CGFloat latestDelta;
@end
- 作成したLayoutクラスにダイナミックアニメーターのインスタンスを保持する
- (id)init
{
    self = [super init];
    if (nil == self) {
        return nil;
    }

    // Create dynamic animator
    self.animator = [[UIDynamicAnimator alloc] initWithCollectionViewLayout:self];
    self.visibleIndexPathsSet = [NSMutableSet set];

    // Configure self
    self.itemSize = CGSizeMake(310, 60);
    self.minimumInteritemSpacing = 1;
    self.minimumLineSpacing = 5;

    return self;
}
prepareLayoutメソッドをオーバーライドしUIAttachmentBehaviorを作成する
- 画面に表示されなくなったbehaiviorを削除する
- (void)prepareLayout
{
    // Invoke super
    [super prepareLayout];

    // Need to overflow our actual visible rect slightly to avoid flickering.
    // Get visible rect
    CGRect  originalRect = (CGRect){.origin = self.collectionView.bounds.origin, .size = self.collectionView.frame.size};
    CGRect  visibleRect = CGRectInset(originalRect, -100, -100);

    // Get attributes in visible rect
    NSArray*    itemsInVisibleRectArray;
    itemsInVisibleRectArray = [super layoutAttributesForElementsInRect:visibleRect];

    // Get their index paths
    NSSet   *itemsIndexPathsInVisibleRectSet;
    itemsIndexPathsInVisibleRectSet = [NSSet setWithArray:[itemsInVisibleRectArray valueForKey:@"indexPath"]];


    //
    // Step 1: Remove any behaviours that are no longer visible.
    //
    NSPredicate*    predicate;
    predicate = [NSPredicate predicateWithBlock:^BOOL(UIAttachmentBehavior* behaviour, NSDictionary* bindings){
        BOOL    currentlyVisible = ([itemsIndexPathsInVisibleRectSet member:[[[behaviour items] firstObject] indexPath]] != nil);
        return !currentlyVisible;
    }];
    NSArray*    noLongerVisibleBehaviours;
    noLongerVisibleBehaviours = [self.animator.behaviors filteredArrayUsingPredicate:predicate];
    [noLongerVisibleBehaviours enumerateObjectsUsingBlock:^(id obj, NSUInteger index, BOOL *stop){
        [self.animator removeBehavior:obj];
        [self.visibleIndexPathsSet removeObject:[[[obj items] firstObject] indexPath]];
    }];

                                …中略…
}
- 新しく画面に表示されるattributeから、behaviourを作成する
//
    // Step 2: Add any newly visible behaviours.
    // A "newly visible" item is one that is in the itemsInVisibleRect(Set|Array) but not in the visibleIndexPathsSet
    predicate = [NSPredicate predicateWithBlock:^BOOL(UICollectionViewLayoutAttributes* item, NSDictionary* bindings){
        BOOL    currentlyVisible = [self.visibleIndexPathsSet member:item.indexPath] != nil;
        return !currentlyVisible;
    }];
    NSArray*    newlyVisibleItems;
    newlyVisibleItems = [itemsInVisibleRectArray filteredArrayUsingPredicate:predicate];


    // Get touch location
    CGPoint touchLocation;
    touchLocation = [self.collectionView.panGestureRecognizer locationInView:self.collectionView];


    [newlyVisibleItems enumerateObjectsUsingBlock:^(UICollectionViewLayoutAttributes* item, NSUInteger idx, BOOL *stop){

        // Get center
        CGPoint center = item.center;

        // Create attachment behavior
        UIAttachmentBehavior *springBehaviour = [[UIAttachmentBehavior alloc] initWithItem:item attachedToAnchor:center];

        // Configure behaviour
        springBehaviour.length = 0.0f;
        springBehaviour.damping = 0.8f;
        springBehaviour.frequency = 1.0f;

        if (!CGPointEqualToPoint(CGPointZero, touchLocation)) {
            CGFloat yDistanceFromTouch;
            CGFloat xDistanceFromTouch;
            CGFloat scrollResistance;
            yDistanceFromTouch = fabsf(touchLocation.y - springBehaviour.anchorPoint.y);
            xDistanceFromTouch = fabsf(touchLocation.x - springBehaviour.anchorPoint.x);
            scrollResistance = (yDistanceFromTouch + xDistanceFromTouch) / 1500.0f;

            if (self.latestDelta < 0) {
                center.y += MAX(self.latestDelta, self.latestDelta * scrollResistance);
            }
            else {
                center.y += MIN(self.latestDelta, self.latestDelta * scrollResistance);
            }
            item.center = center;
        }
        [self.animator addBehavior:springBehaviour];
        [self.visibleIndexPathsSet addObject:item.indexPath];
    }];
- layoutAttributesForElementsInRect:メソッドをオーバーライドし、dynamic animatorのitemsInRect:メソッドを呼び、dynamic animatorに追加されているattachment behaviorのlayout attributesを返す
- (NSArray*)layoutAttributesForElementsInRect:(CGRect)rect
{
    return [self.animator itemsInRect:rect];
}
- layoutAttributesForItemAtIndexPath:メソッドをオーバーライドし、dynamic animatorのlayoutAttributesForCellAtIndexPath:メソッドを呼び、indexPathで指定されたlayout attributesを返す
- (UICollectionViewLayoutAttributes*)layoutAttributesForItemAtIndexPath:(NSIndexPath *)indexPath
{
    return [self.animator layoutAttributesForCellAtIndexPath:indexPath];
}
- shouldInvalidateLayoutForBoundsChange:メソッドをオーバーライドし、layout attributeの位置を更新する
- (BOOL)shouldInvalidateLayoutForBoundsChange:(CGRect)newBounds{
    // Calc content offset's y
    UIScrollView*   scrollView;
    CGFloat         delta;
    scrollView = self.collectionView;
    delta = newBounds.origin.y - scrollView.bounds.origin.y;

    self.latestDelta = delta;

    // Get touch location
    CGPoint touchLocation;
    touchLocation = [self.collectionView.panGestureRecognizer locationInView:self.collectionView];

    [self.animator.behaviors enumerateObjectsUsingBlock:^(UIAttachmentBehavior *springBehaviour, NSUInteger idx, BOOL * stop){
        // Calc distancez
        CGFloat yDistanceFromTouch;
        CGFloat xDistanceFromTouch;
        CGFloat scrollResistance;
        yDistanceFromTouch = fabsf(touchLocation.y - springBehaviour.anchorPoint.y);
        xDistanceFromTouch = fabsf(touchLocation.x - springBehaviour.anchorPoint.x);
        scrollResistance = (yDistanceFromTouch + xDistanceFromTouch) / 1500.0f;

        // Get layout attribute
        UICollectionViewLayoutAttributes*   item;
        item = springBehaviour.items.firstObject;

        // Decide layout attribute center
        CGPoint center = item.center;
        if (delta < 0) {
            center.y += MAX(delta, delta * scrollResistance);
        }
        else {
            center.y += MIN(delta, delta * scrollResistance);
        }
        item.center = center;

        // Update dynamic item
        [self.animator updateItemUsingCurrentState:item];
    }];

    return NO;
}
以上でiOS 7のMessage appのようなUIが実現できます。
パフォーマンスについて
prepareLayout:で画面の外に消えたattributesのdynamic behaviorをanimatorからremoveし、 dynamic behaviorを追加する際は、新しく画面に表示される分だけ追加するようにすることで パフォーマンスを考慮した実装となっている。参考情報がわかりやすいのです。
所感
UIDynamicsAnimatorがUICollectionViewLayoutとシームレスに連携できるようになっていてすごい。
参考情報
obj io
UICollectionView-Spring-Demo