UIKit Dynamics 入門
UIKit Dynamicsフレームワークを使ってみました。
UIKit Dynamicsフレームワークは、iOS 7から導入された新しいAPIです。
これを使うと、UIViewにリアリスティックな動きをつけられます。
今回は基本的な紹介だけですが、応用するといい感じのUIが作れます。
使用するクラス
UIDynamicAnimator
役割 - 全体のコンテキストを提供 - 座標系の決定 - 物理エンジンのコントロール - ビヘイビアの把握
UIDynamicBehavior
Predefined Behaviors
UIGravityBehavior
UICollisionBehavior
UIAttachmentBehavior
UIPushBehavior
UISnapBehavior
DEMO
UIGravityBehavior

- Sample Code
// Create view
UIView* view = [[UIView alloc] initWithFrame:CGRectZero];
view.backgroundColor = [UIColor purpleColor];
[self.view addSubview:view];

// Create animator
self.animator = [[UIDynamicAnimator alloc] initWithReferenceView:self.view];

// Create gravity behavior
self.gravity = [[UIGravityBehavior alloc] initWithItems:@[view]];;

// Add behavior
[self.animator addBehavior:self.gravity];
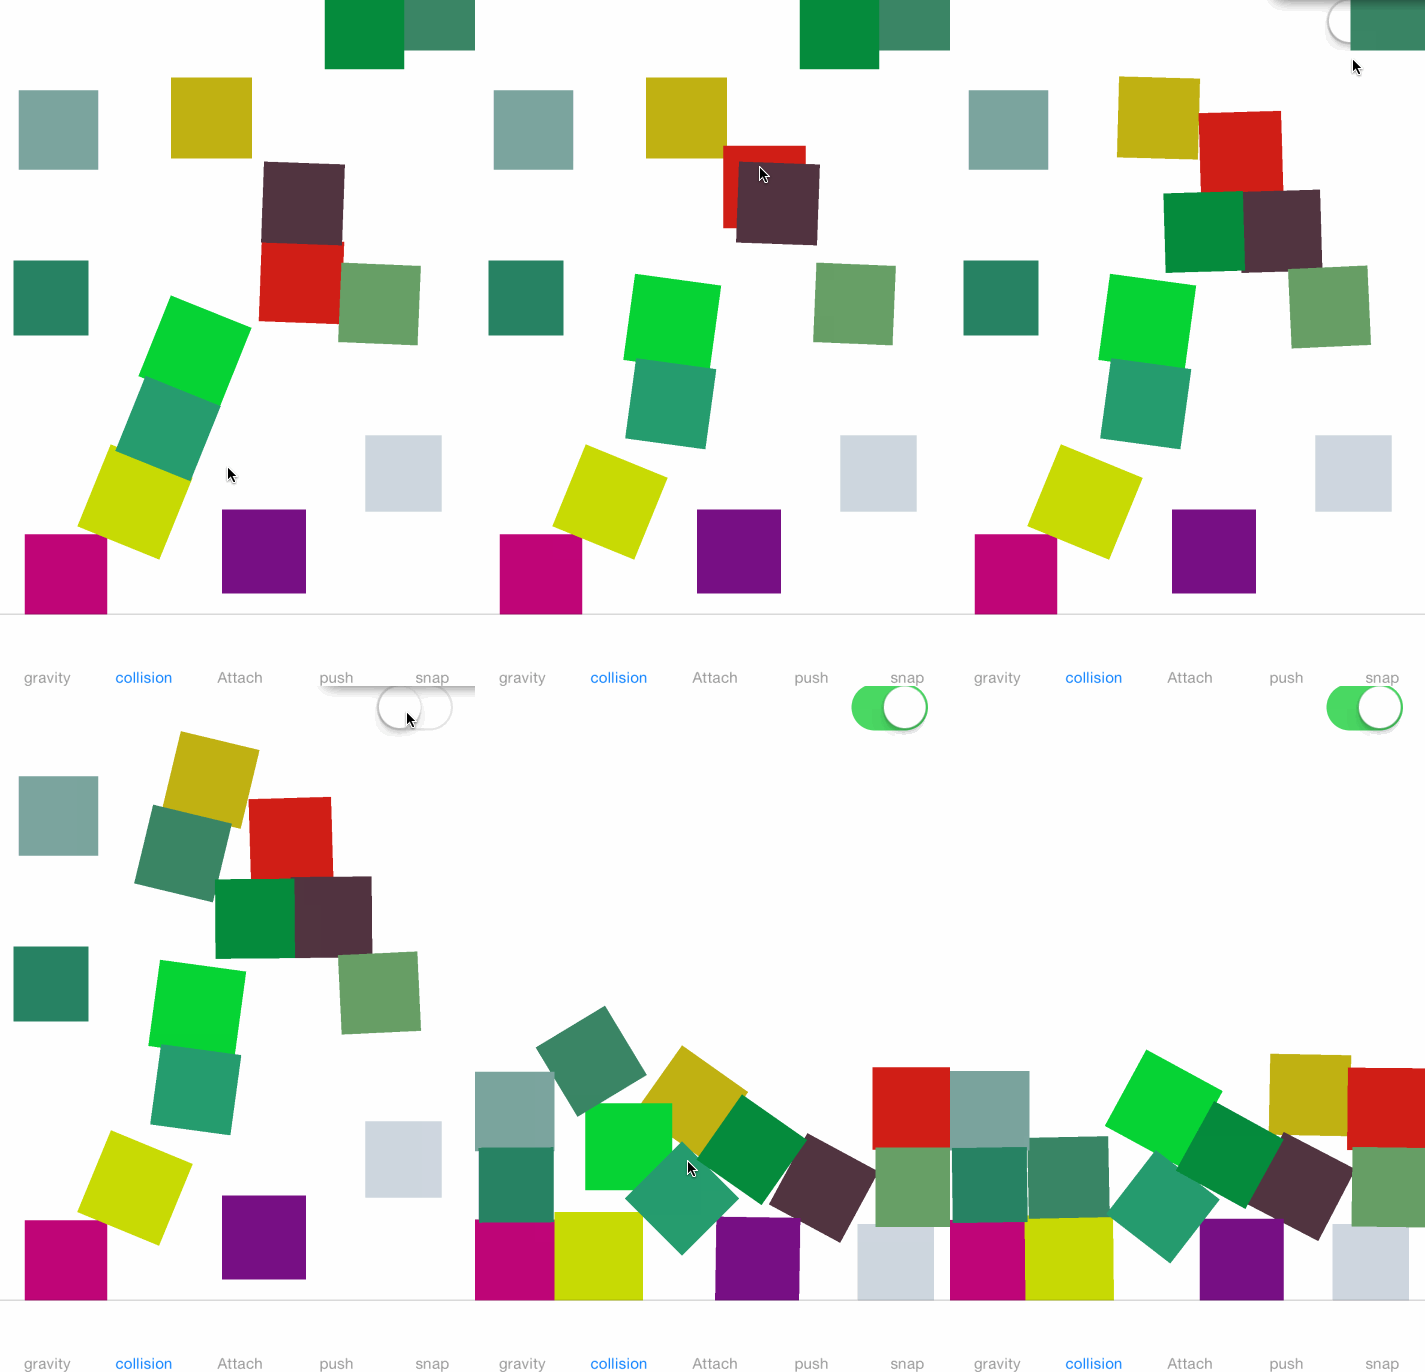
UICollisionBehavior + UIGravityBehavior

- Sample Code
// Create sub views
NSMutableArray* views = [NSMutableArray array];
for (int i = 0; i < 20; i++) {
    UIView* view;
    view = [[UIView alloc] initWithFrame:CGRectZero];
    view.backgroundColor = [UIColor colorWithRed:(rand()%255)/255.0f green:(rand()%255)/255.0f blue:(rand()%255)/255.0f alpha:1.0f];
    [self.view addSubview:view];

    …中略…

    // Collect views
    [views addObject:view];
}

// Create dynamic animator
self.animator = [[UIDynamicAnimator alloc] initWithReferenceView:self.view];

// Create collision behavior
self.collision = [[UICollisionBehavior alloc] initWithItems:views];
self.collision.collisionMode = UICollisionBehaviorModeEverything;
self.collision.translatesReferenceBoundsIntoBoundary = YES;

// Create gravity behavior
self.gravity = [[UIGravityBehavior alloc] initWithItems:views];

// Add behaviors
[self.animator addBehavior:self.collision];
[self.animator addBehavior:self.gravity];
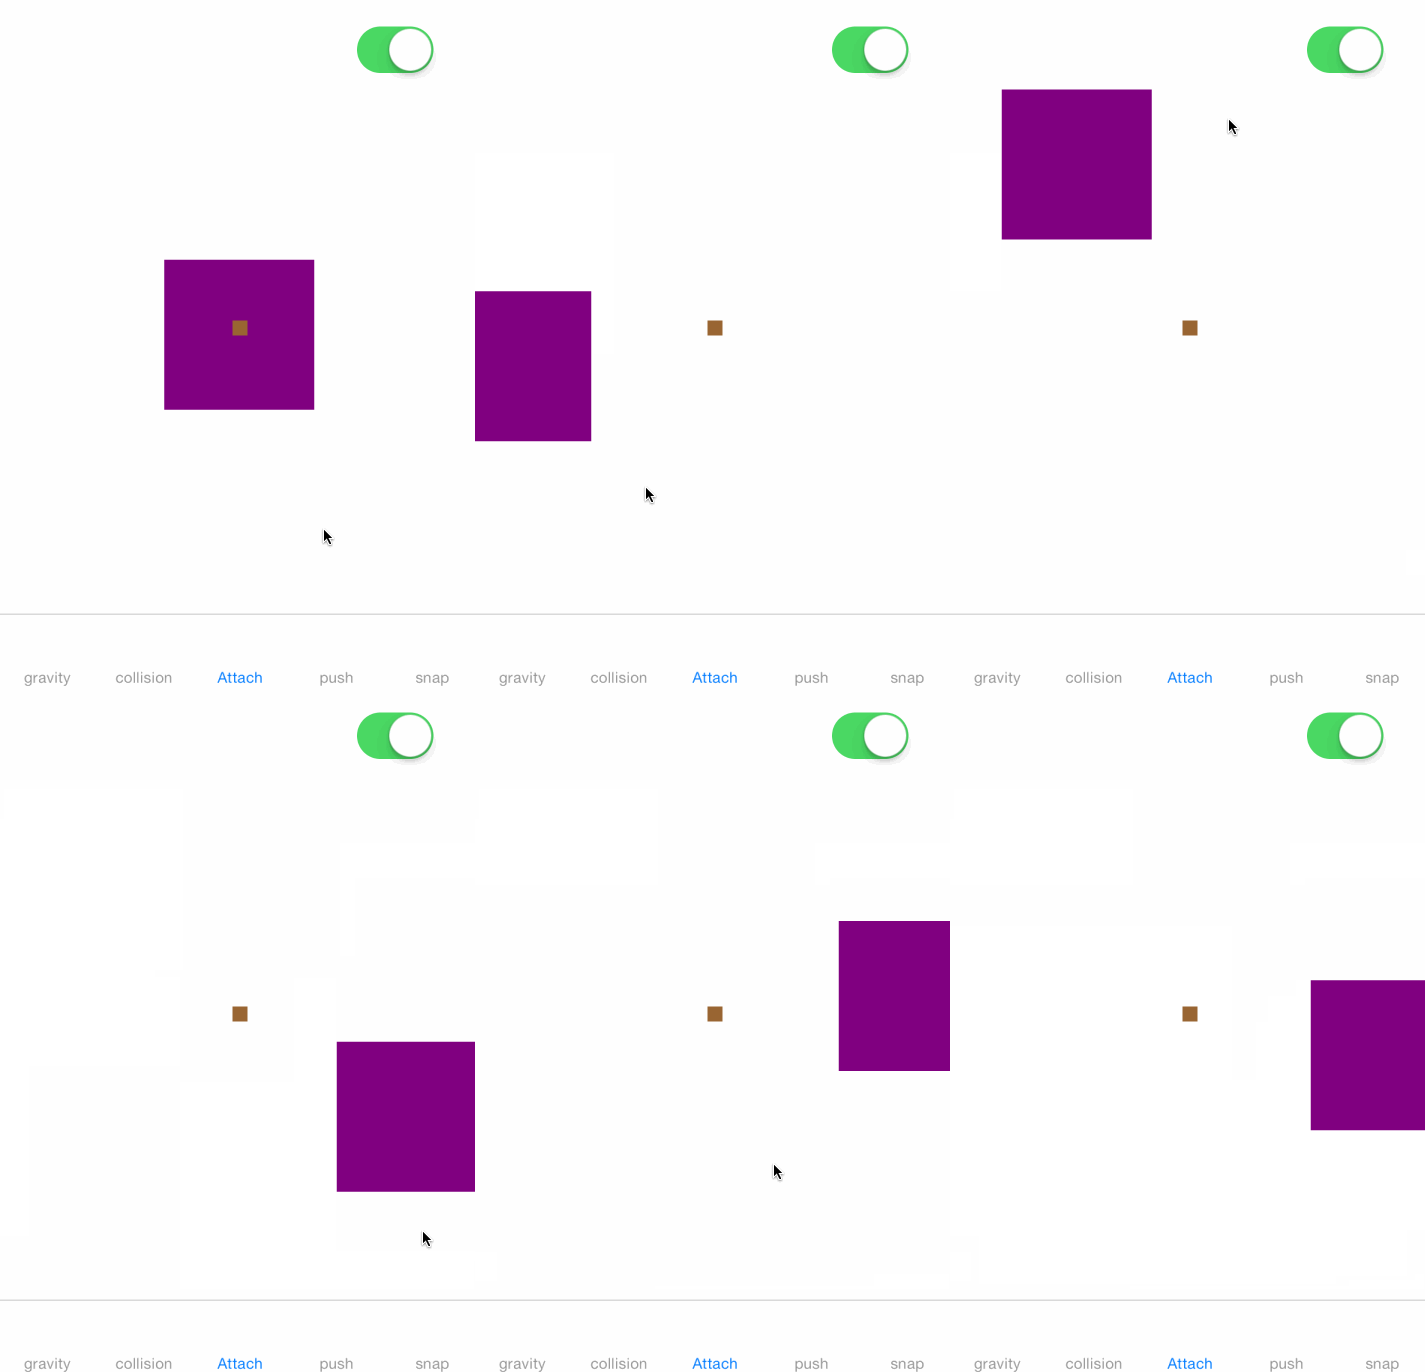
UIAttachmentBehavior + UIGravityBehavior

- Sample Code
// Create sub view
UIView* view = [[UIView alloc] initWithFrame:CGRectZero];
view.backgroundColor = [UIColor purpleColor];
[self.view addSubview:view];

…中略...

// Create dynamic animator
self.animator = [[UIDynamicAnimator alloc] initWithReferenceView:self.view];

// Create attachment behavior
self.attachment = [[UIAttachmentBehavior alloc] initWithItem:view attachedToAnchor:self.view.center];
self.attachment.damping = 0.1f;

// Create gravity behavior
self.gravity = [[UIGravityBehavior alloc] initWithItems:@[view]];

// Add behaviors
[self.animator addBehavior:self.attachment];
[self.animator addBehavior:self.gravity];
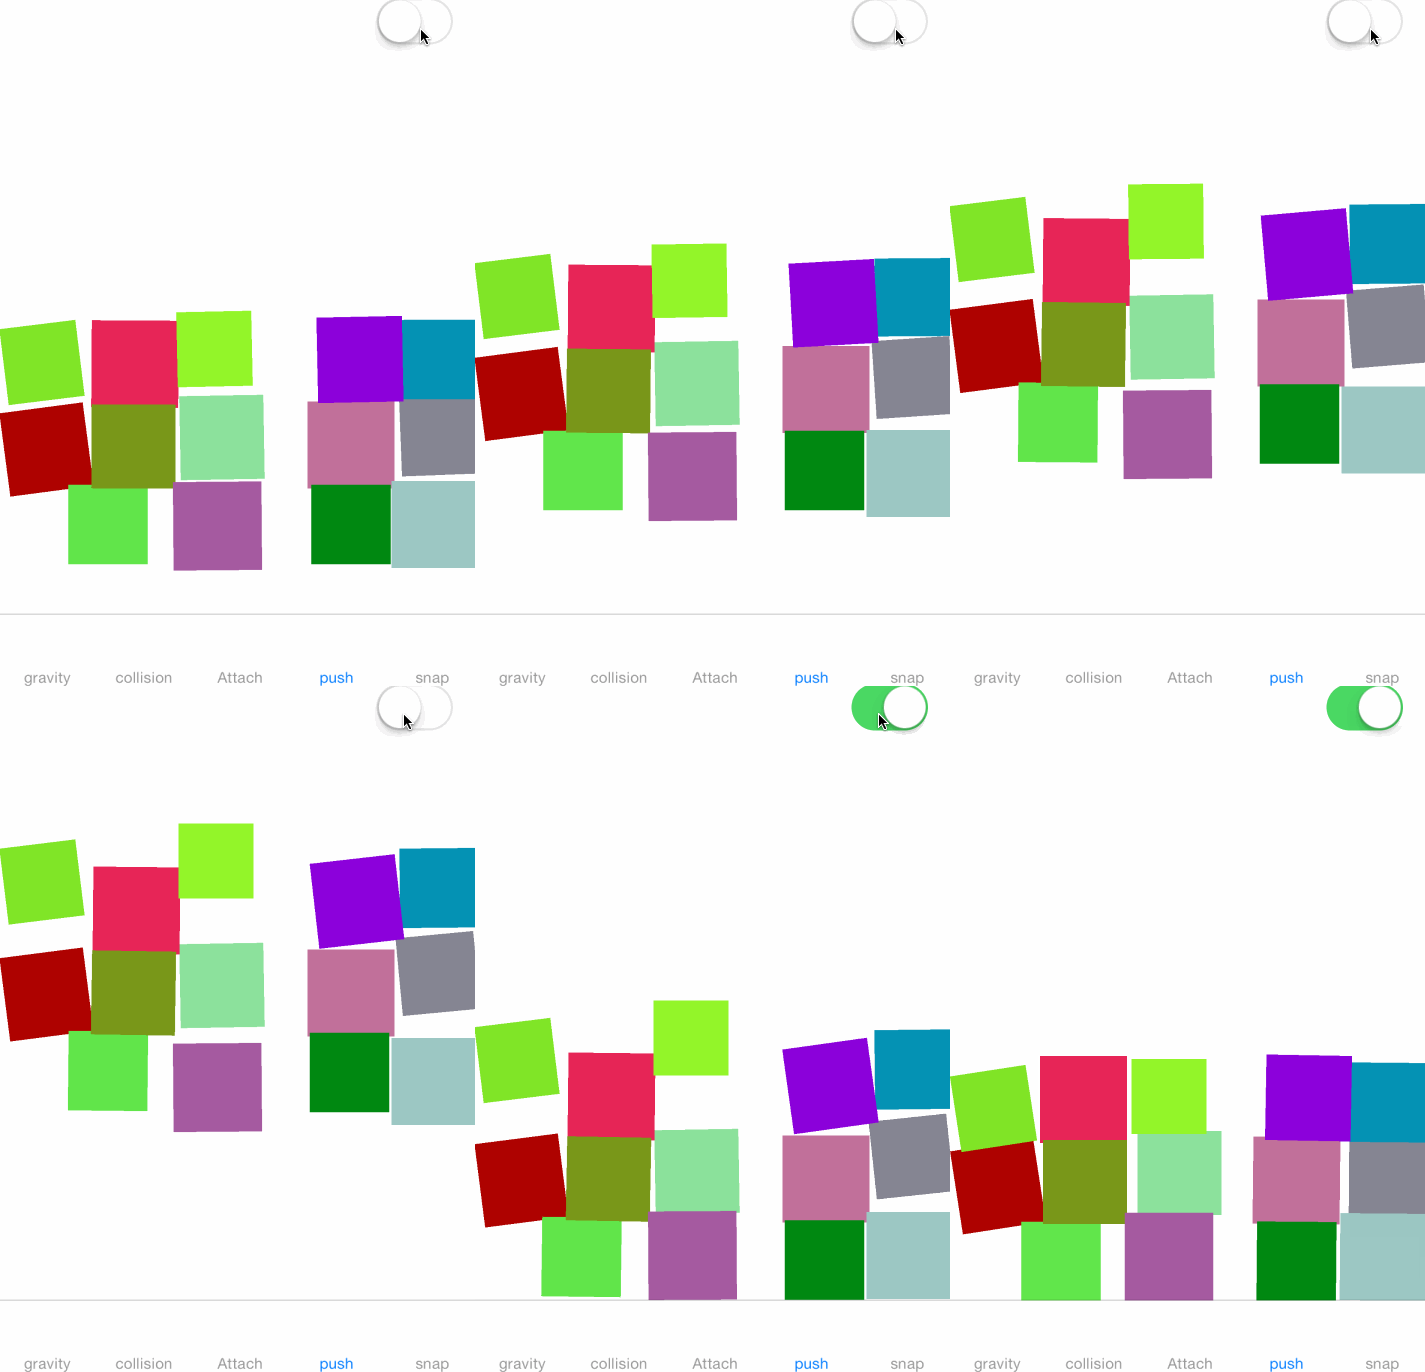
UIPushBehavior + UICollisionBehavior + UIGravityBehavior

- Sample Code
NSMutableArray* views = [NSMutableArray array];
for (int i = 0; i < 20; i++) {
    // Create sub views
    UIView* view;
    view = [[UIView alloc] initWithFrame:CGRectZero];
    view.backgroundColor = [UIColor colorWithRed:(rand()%255)/255.0f green:(rand()%255)/255.0f blue:(rand()%255)/255.0f alpha:1.0f];
    [self.view addSubview:view];

    …中略...

    // Collect views
    [views addObject:view];
}

// Create dynamic animator
self.animator = [[UIDynamicAnimator alloc] initWithReferenceView:self.view];

// Create push behavior
self.pushBehavior = [[UIPushBehavior alloc] initWithItems:views mode:UIPushBehaviorModeInstantaneous];
self.pushBehavior.magnitude = 0.1f;
self.pushBehavior.pushDirection = CGVectorMake(0, -0.1);

// Create collision behavior
self.collistion = [[UICollisionBehavior alloc] initWithItems:views];
self.collistion.collisionMode = UICollisionBehaviorModeEverything;
self.collistion.translatesReferenceBoundsIntoBoundary = YES;

// Create gravity behavior
self.gravity = [[UIGravityBehavior alloc] initWithItems:views];

// Add behaviors
[self.animator addBehavior:self.collistion];
[self.animator addBehavior:self.pushBehavior];
[self.animator addBehavior:self.gravity];
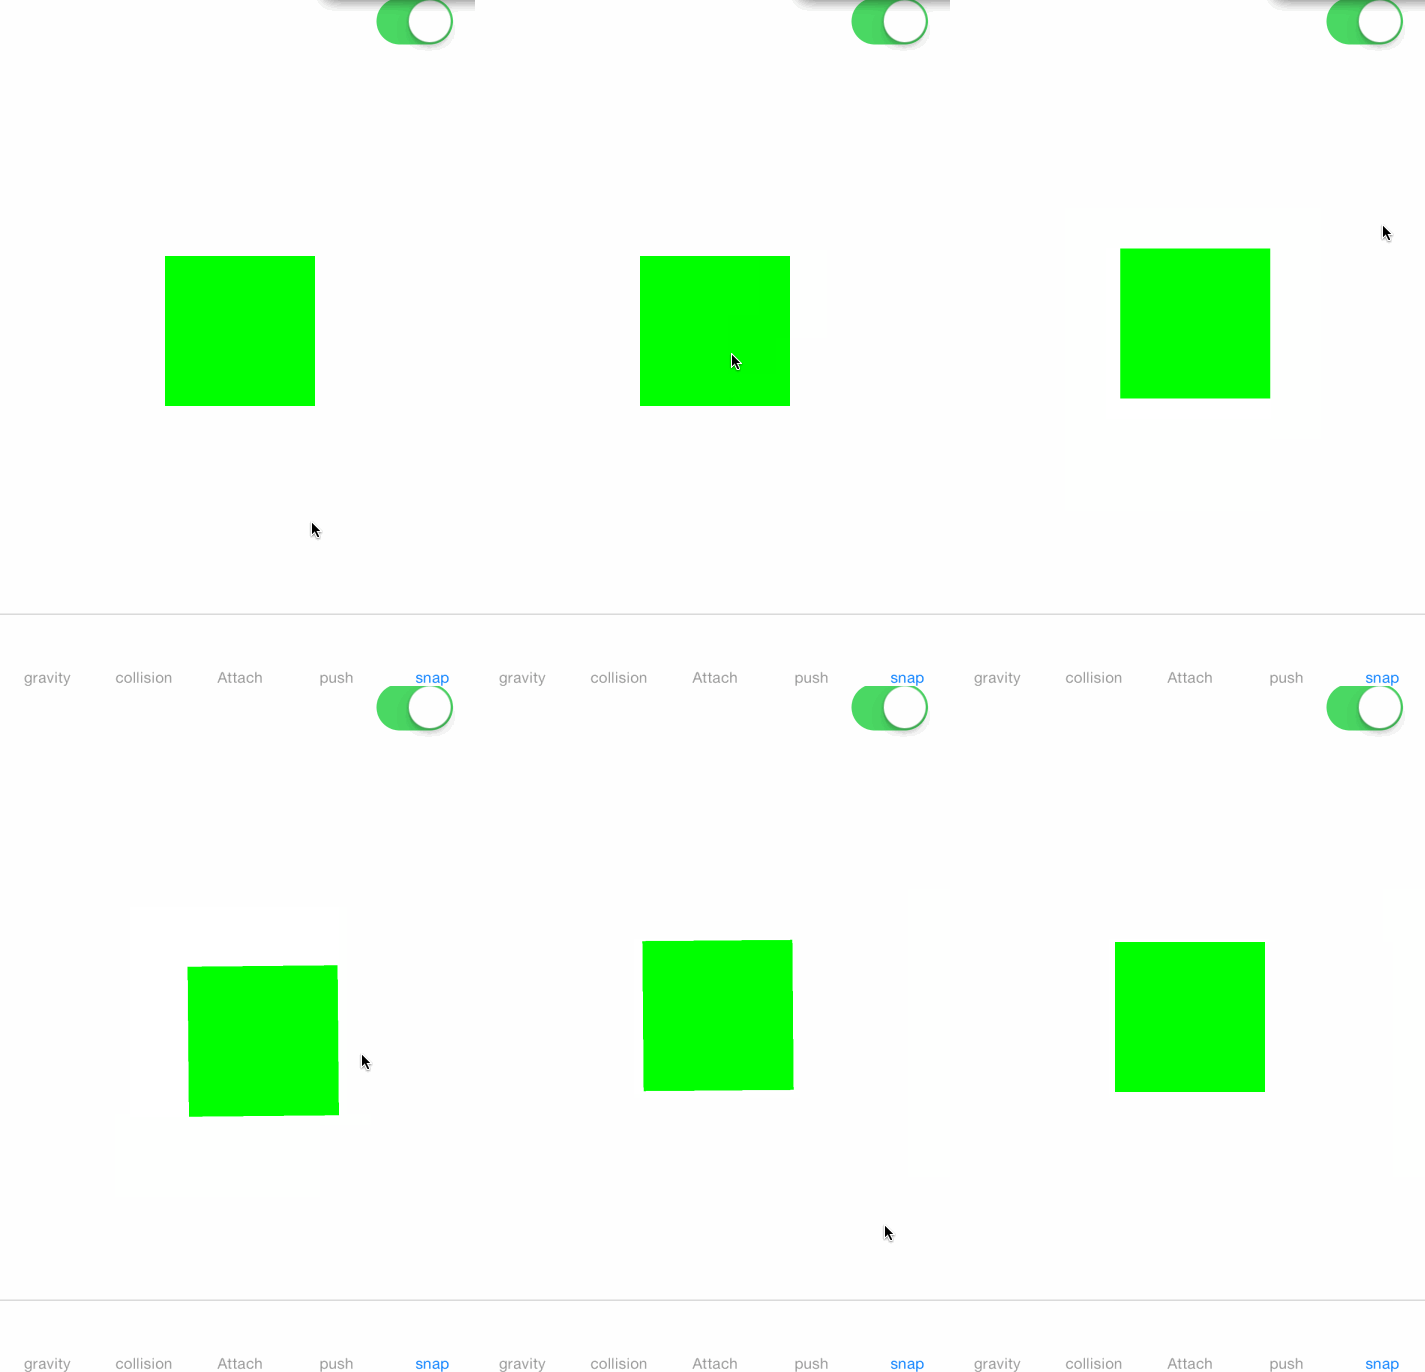
UISnapBehavior

- Sample Code
// Create sub view
UIView* view = [[UIView alloc] initWithFrame:CGRectZero];
view.backgroundColor = [UIColor greenColor];
[self.view addSubview:view];

…中略...

// Create dynamic animator
self.animator = [[UIDynamicAnimator alloc] initWithReferenceView:self.view];

// Create snap behavior
self.snap = [[UISnapBehavior alloc] initWithItem:view snapToPoint:self.view.center];
self.snap.damping = 0.1f;

// Add behaviors
[self.animator addBehavior:self.snap];
iBeaconを試してみた
iBeaconを試すにあたり、デモアプリを作りました。その際、参考にした記事等、調べたことをまとめます。
Bluetooth Low Enerygとは
Bluetooth Low Energy(以下、BLEと省略)は、Bluetooth4で追加された超低消費電力の通信仕様です。
BLEには、セントラルとペリフェラルという概念があります。通常、iPhoneがセントラル、心拍センサーなどの周辺装置がペリフェラルになります。
iOSアプリケーション開発
iOSアプリケーション開発では、クラシックBluetoothとBluetooth LEデバイスとで、扱いが違います。
ペアリングはない
iOSを通さず、アプリケーションから直接、デバイスの発見と接続ができる
Bluetooth LE用のバックグラウンド・モードがある
Bluetooth LEデバイスには、ペアリングはありません。クラシックBluetoothデバイスは、初めてiPhoneと接続するときに、ペアリングという接続認証が必要でした。Bluetooth LEデバイスでは、接続処理にiOSが一切関与しないため、ペアリングはありません。
Bluetooth LEのデバイスの発見、接続、通信そして切断も、すべてiOSアプリケーションが行います。iOSが関与することはありません。
iOSアプリケーションには、Bluetooth LE専用のバックグラウンド・モードが用意されています。バックグラウンドで、Bluetooth LEデバイスと接続して通信しつづける、あるいはデバイスを発見して接続をすることができます。
Bluetooth LEのネットワーク・トポロジーには、セントラルとペリフェラルという2つの役割があります。前節で例に上げたテレビのリモコンの場合は、テレビがセントラル、リモコンがペリフェラルです。iOS6では、iOSアプリケーションはセントラルにも、ペリフェラルにもなれます。つまり、iOSアプリケーション自体が、テレビのリモコンとして振る舞うことができます。
実装
セントラル app
セントラルの実装は、CoreLocationフレームワークのCLLocationManagerを使い、ペリフェラルを検知します。
CoreLocation framework
CLLocationManager
CLLocationManagerDelegate
CLLocationManagerの作成・モニタリング開始のコード
if ([CLLocationManager isMonitoringAvailableForClass:[CLBeaconRegion class]]) {
        // Create location manager
        self.locationManager = [CLLocationManager new];
        self.locationManager.delegate = self;

        // Create proximity uuid
        self.proximityUUID = [[NSUUID alloc] initWithUUIDString:@"C1B19D33-6EBC-434A-AC9C-39A6A6265C58"];

        // Create beacon region
        self.beaconRegion = [[CLBeaconRegion alloc] initWithProximityUUID:self.proximityUUID identifier:@"testregion"];

        // Start monitoring
        [self.locationManager startMonitoringForRegion:self.beaconRegion];
    }
Beaconを検知した時呼ばれるデリゲートメソッドの引数からCLBeaconオブジェクトを取得し、こやつから、proximityUUIDやrssi情報が取得できます。
- (void)locationManager:(CLLocationManager *)manager didRangeBeacons:(NSArray *)beacons inRegion:(CLBeaconRegion *)region
{
    if (beacons.count > 0) {
        // Get nearest object
        CLBeacon *nearestBeacon = beacons.firstObject;

        NSString *rangeMessage;

        // Decide message distance
        switch (nearestBeacon.proximity) {
            case CLProximityImmediate:
                rangeMessage = @"Range Immediate: ";
                break;
            case CLProximityNear:
                rangeMessage = @"Range Near: ";
                break;
            case CLProximityFar:
                rangeMessage = @"Range Far: ";
                break;
            default:
                rangeMessage = @"Range Unknown: ";
                break;
        }

ペリフェラル app
ペリフェラルの実装は、CoreBluetoothフレームワークのCBPeripheralManagerを使い、アドバタイズします。
CoreBluetooth framework
CBPeripheralManager
CBPeripheralManagerDelegate
アドバタイズ開始コード
// Create proximity uuid
    self.proximityUUID = [[NSUUID alloc] initWithUUIDString:@"C1B19D33-6EBC-434A-AC9C-39A6A6265C58"];

    // Create peripheral manager
    self.peripheralManager = [[CBPeripheralManager alloc] initWithDelegate:self queue:nil options:nil];

    // Start advertise
    if (self.peripheralManager.state == CBPeripheralManagerStatePoweredOn) {
        [self startAdvertising];
    }

- (void)startAdvertising
{
    // Create data for advertise
    CLBeaconRegion *beaconRegion = [[CLBeaconRegion alloc] initWithProximityUUID:self.proximityUUID
                                                                           major:1
                                                                           minor:2
                                                                      identifier:@"testregion"];
    NSDictionary *beaconPeripheralData = [beaconRegion peripheralDataWithMeasuredPower:nil];

    // Start advertise
    [self.peripheralManager startAdvertising:beaconPeripheralData];
}

所感
アプリ側で取得できるのは、電波強度とデバイス間の大体の距離でした。
正確な距離(何メートル)とかを取得するのは難しそうです。
Beaconの設置場所へ向かって歩いて通り過ぎると検知できませんでした。
設置場所に止まって5秒くらいたつと検知しました。
今後、Bluetooth Low Enerygについて詳しく調べたいと思います。
引用/参考URL
http://reinforce-lab.github.io
http://reinforce-lab.github.io/blog/2013/01/21/ios-ble-introduction/
About Motion Activity
Motion data stored by a device
モーションデータの取得方法
モーションデータを活用すると、ユーザーの状態(歩いている、走っている、乗り物に乗っている、静止している)をアプリ側で知ることができます。
ユーザーの状態によって、画面の表示を変える等、なんらかのかたちで活用できないか考えています。
CMMotionActivityManager
デバイスが記録したモーションデータへのアクセスを提供する
CMMotionActivity
このクラスは、モーションが更新された際のデータを保持している
Code example
// Check available
if ([CMMotionActivityManager isActivityAvailable]) {

    // Create manager
        self.motionActivityManager = [[CMMotionActivityManager alloc] init];

    // Register handler
        [self.motionActivityManager startActivityUpdatesToQueue:[NSOperationQueue mainQueue]
                                                    withHandler:^(CMMotionActivity *activity) {
                                                         [self _updateLabels:activity];
                                                     }];
    }
期間を指定してモーションデータを取得する(過去7日間まで)
if ([CMMotionActivityManager isActivityAvailable]) {
        self.motionActivityManager = [[CMMotionActivityManager alloc] init];

        NSDate *now = [NSDate date];
        NSCalendar *gregorian = [[NSCalendar alloc] initWithCalendarIdentifier:NSGregorianCalendar];
        NSDateComponents *comps = [gregorian components:NSCalendarUnitYear | NSCalendarUnitMonth | NSCalendarUnitDay | NSCalendarUnitHour fromDate:now];
        [comps setHour:0];
        NSDate *today = [gregorian dateFromComponents:comps];

        __weak typeof(self) weakSelf = self;
        [self.motionActivityManager queryActivityStartingFromDate:today
                                                           toDate:now
                                                          toQueue:[NSOperationQueue mainQueue]
                                                      withHandler:^(NSArray *activities, NSError *error) {
                                                          if (error) {
                                                              UIAlertView *alert = [[UIAlertView alloc] initWithTitle:NSLocalizedString(@"Error", nil)
                                                                                                              message:[error description]
                                                                                                             delegate:nil
                                                                                                    cancelButtonTitle:NSLocalizedString(@"OK", nil)
                                                                                                    otherButtonTitles:nil, nil];
                                                              [alert show];
                                                              return ;
                                                          }
                                                          weakSelf.activities = [activities mutableCopy];
                                                         [self _updateCircles];
                                                      }];
    }
How to use CMStepCounter
CMStepCounter
CMStepCounterクラスは歩数へのアクセスを提供する
歩数の計測を開始する
- (void)startStepCountingUpdatesToQueue:(NSOperationQueue *)queue updateOn:(NSInteger)stepCounts withHandler:(CMStepUpdateHandler)handler
Code example
// Check step counting available
if ([CMStepCounter isStepCountingAvailable]) {
        __weak typeof(self) weakSelf = self;

    // Create step counter
        self.stepCounter = [[CMStepCounter alloc] init];

    // Start step counting
        [self.stepCounter startStepCountingUpdatesToQueue:[NSOperationQueue mainQueue]
                                                 updateOn:1
                                              withHandler:^(NSInteger numberOfSteps, NSDate *timestamp, NSError *error) {
                                                  weakSelf.stepCountLabel.text = [@(numberOfSteps) stringValue];
                                              }];
    }
歩数の計測を停止する
- (void)stopStepCountingUpdates
期間を指定して歩数を取得する(過去7日間まで取得可能)
- (void)queryStepCountStartingFrom:(NSDate )start to:(NSDate )end toQueue:(NSOperationQueue *)queue withHandler:(CMStepQueryHandler)handler
Code Example
// Check step counting available
if ([CMStepCounter isStepCountingAvailable]) {
        __weak typeof(self) weakSelf = self;

        NSDate *now = [NSDate date];
        NSCalendar *gregorian = [[NSCalendar alloc] initWithCalendarIdentifier:NSGregorianCalendar];
        NSDateComponents *comps = [gregorian components:NSCalendarUnitYear | NSCalendarUnitMonth | NSCalendarUnitDay | NSCalendarUnitHour fromDate:now];
        [comps setHour:0];
        NSDate *today = [gregorian dateFromComponents:comps];

        [self.stepCounter queryStepCountStartingFrom:today
                                                  to:now
                                             toQueue:[NSOperationQueue mainQueue]
                                         withHandler:^(NSInteger numberOfSteps, NSError *error) {
                                             NSLog(@"------------------------------------------");
                                             NSLog(@"%s : %d", __PRETTY_FUNCTION__, __LINE__);
                                             NSLog(@"numberOfSteps : %d", (int)numberOfSteps);
                                             NSLog(@"error : %@", error);

                                             weakSelf.totalStepsLabel.text = [@(numberOfSteps) stringValue];
                                         }];
    }
How to iOS 7 Intaraction Transtion - NavigationController
How to iOS 7 Intaraction Transtion (NavigationController)
1.Return animator object in UINavigationControllerDelegate method.
- (id)navigationController:(UINavigationController *)navigationController animationControllerForOperation:(UINavigationControllerOperation)operation fromViewController:(UIViewController *)fromVC toViewController:(UIViewController *)toVC
{
    NKRBaseAnimator*    animator;
    animator = [[NKRBackAnimator alloc] init];
    animator.reverse = (operation == UINavigationControllerOperationPop);
    animator.duration = 0.3f;
    return animator;
}
1.Return UIViewControllerInteractiveTansitioning object in UINavigationControllerDelegate method.
- (id)navigationController:(UINavigationController *)navigationController interactionControllerForAnimationController:(id)animationController
{
    return self.interactiveTransition;
}
NKRBaseInteraction.h
#import
@interface NKRBaseInteraction : UIPercentDrivenInteractiveTransition
@end
NKRBaseInteraction.m
#import "NKRBaseInteraction.h"

@implementation NKRBaseInteraction

// This is important! if not override this method, animateTransition: was executed twice.
- (CGFloat)completionSpeed
{
    return 1 - self.percentComplete;
}

@end
2.Push or Pop view controller in UIGestureRecognizerStateBegan.
if (recognizer.state == UIGestureRecognizerStateBegan) {
        // Create a interactive transition
        self.interactiveTransition = [[NKRBaseInteraction alloc] init];

        if (translation.y > 0) {
            // Push view controller
            ViewController*  viewController;
            viewController = [[UIStoryboard storyboardWithName:@"Main" bundle:nil] instantiateViewControllerWithIdentifier:@"ViewController"];
            viewController.view.backgroundColor = [UIColor colorWithRed:(rand()%255)/255.0f green:(rand()%255)/255.0f blue:(rand()%255/255.0f) alpha:1.0f];
            [self.navigationController pushViewController:viewController animated:YES];
        }
        else {
            // Pop view controller
            [self.navigationController popViewControllerAnimated:YES];
        }
    }
3.Do updateInteractiveTransition: in UIGestureRecognizerStateChanged.
else if (recognizer.state == UIGestureRecognizerStateChanged) {
        // if an interactive transitions is 100% completed via the user interaction, for some reason
        // the animation completion block is not called, and hence the transition is not completed.
        // This glorious hack makes sure that this doesn't happen.
        // see: https://github.com/ColinEberhardt/VCTransitionsLibrary/issues/4
        if (fraction >= 1.0)
            fraction = 0.99;

        // Update the interactive transition's progress
        [self.interactiveTransition updateInteractiveTransition:fraction];
    }
4.Do finishInteractiveTransition and cancelInteractiveTransition in UIGestureRecognizerStateEnded and UIGestureRecognizerStateCancelled
else if (recognizer.state == UIGestureRecognizerStateEnded ||
             recognizer.state == UIGestureRecognizerStateCancelled) {
        // Finish or cancel the interactive transition
        if (fraction > 0.5) {
            [self.interactiveTransition finishInteractiveTransition];
        }
        else {
            [self.interactiveTransition cancelInteractiveTransition];
        }

        // Clear interaction
        self.interactiveTransition = nil;
    }
iOS7 テキストの回り込み
iOS 7からUITextViewでテキストの回り込みが指定できるようになった。 NSTextContainerのexclusionPathsプロパティに、回り込みさせたい領域のパスを指定すると、文字がパスに沿って表示される。
- (void)_updateTextView
{
    UIBezierPath*   bezierPath;
    bezierPath = [UIBezierPath bezierPathWithRect:self.imageView.frame];

    UIBezierPath*   bezierPath2;
    bezierPath2 = [UIBezierPath bezierPathWithOvalInRect:_circleView.frame];

    self.textView.textContainer.exclusionPaths = @[bezierPath, bezierPath2];
}

参考サイト
iOS 7のカスタムトランジション
AnimationController
<UIViewControllerAnimatedTransitioning>プロトコルを採用したクラスを用意し、下記メソッドにアニメーションを記述する。
- (void)animateTransition:(id<UIViewControllerContextTransitioning>)transitionContext
- (NSTimeInterval)transitionDuration:(id<UIViewControllerContextTransitioning>)transitionContext
モーダル
モーダル表示のアニメーションをカスタマイズする方法
遷移元ViewControllreにUIViewControllerTransitioningDelegateメソッドを実装し、AnimationControllerを返す
– animationControllerForPresentedController:presentingController:sourceController:
– animationControllerForDismissedController:
遷移先ViewControllreの「transitioningDelegate」プロパティにデリゲートオブジェクトを設定する
toVC.transitioningDelegate = self;遷移先ViewControllreのmodalPresentationStyleプロパティにUIModalPresentationCustomを指定する
toVC.modalPresentationStyle = UIModalPresentationCustom;presentViewController:animated:completion:を呼ぶ
TabBarController
タブ切り替え時の実装方法
- TabBarControllerDlegateの下記メソッドを実装し、AnimationControllerを返す
tabBarController:animationControllerForTransitionFromViewController:toViewController:
UINavigationController
UINavigationControllerのPushやPopの時のアニメーションをカスタマイズする方法
- UINavigationControllerDelegateの下記メソッドを実装し、AnimationControllerを返す
navigationController:animationControllerForOperation:fromViewController:toViewController: